~MAKING DOLLS TRANSPARENT~

Okay, so you want to know how to make your dolls transparent? First of all I will tell you what this means. Transparent means that if you would like to make your dolls fit to your pages withought any backgrounds at all behind them you can make them transparent. Here is an image for example:

NON-TRANSPARENT

TRANSPARENT

Got the idea of what I mean now? Okay let's move on. Now first of all, you will need a program to do this. It's called Animation Shop. You can go to my thanks page and find the link to it there. Now once you have it you should make your doll that you wish and open up Animation Shop. Once you have done that you need to follow these steps in ooder to make your doll transparent:

1.) Click on (file) at the top bar and click (Open).

2.) Pick your doll and once it has shown up click on the little magnifying glass right next to the arrow icon at the top.

This is so you can see up close more to your doll as you begin to make it transparent. It is always good to make sure you get it all!

3.) Next, Click on the paint can along that same bar and then click on the outer area of your doll.

Sometimes the dolls background will change to a color that is specified on the palette on the right of the program. That means you did not do it correctly lol. What you must always remember to do it make sure to click on the little check box that says (To Canvas Color) Along the same bar as the paint can and magnifying glass. That will make it so it is transparent. Now some other times it will not let you click on that little box until you click on the outer area of your doll and make it that color first. Go ahead and do that. Then click on the little check box. Now STOP! Why? Because if you do not listen carefully you will ruin your doll. Right after you click on the check box go up to (Edit) and then click on (Undo). That will put your doll back to it's original background yet still have the check box checked for you. Now you can click on the outer area of your doll.

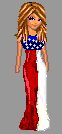
4.) Now, you need to click on every spot of your doll that you see it's original background in. That means say for instance you see it's background in the spot of it's arm, or hair pieces, or even shoe strings. That is why you need to magnify your doll to see each one of these spots and make sure you get it all filled in with the paint can. Some dolls are hard to paint can because their hair pieces are very small like curls for instance. Just make her as big as you want so that you can see clearly of what you paint in.

5.) Now that you have done that you need to zoom back out. Just go up to view and click on (Zoom Out By 1) or (Zoom Out By 5) Whichever you want. Keep doing that until you have reached the size you like.

6.) Next I will show you how to crop your doll so that it will be more organized. Click on the crop icon on the same bar as the paint can and magnifying glass. It should look like this:

7.) Now you can crop your doll. After you have clicked on the crop icon, click on (Options) Along the same bar. A box should come up asking you to Surround the Opaque area or Surround the animated area. Click on the Opaque area one and then click ok. There should be a little outline around your doll now.

8.) After you have done that, click on the (Crop) Button right next to the Options button where we just clicked and your doll should then crop itself.

Tadaaaa! Your doll is created and transparent :D! Great job! Now all you need to do is save it and you have your doll! :D